Sunday, September 18, 2011

OH MY GOD ... PRESSURE COOKERS AND SPAGHETTI MEAT SAUCE

BE AFRAID ... BE VERY AFRAID ... NOT!

When Larry was a child his Grandmother had a pressure cooker and she used it a lot to can fresh vegetables from the prolific garden maintained by his Grandfather in their yard.  When it was on the stove the pressure cooker would hiss and the tiny valve perched precariously on the top would rock back and forth as the steam escaped allowing tantalizing odors to escape into the air.  

One day this idyllic venue erupted into a bomb!  Larry was just about to enter the kitchen when there was an enormous "whooooof" sound followed by whap, splat, whomp, splat, splat, splat.  When Larry walked into the kitchen the walls and ceiling looked like a Jackson Pollack painting covered with what we refer to as the drip and splatter school of art.  Only this was beans.  Beans on the ceiling, beans on the walls and beans on the windows and counter top.  Beans all over.  Larry's Grandmother ran to him to make sure he hadn't been parboiled by the erupting liquid.  Larry swore on the spot that no matter what, he would never, never allow a deadly weapon like that in his kitchen.  

Flash forward forty years. 

Cooking show.  Featuring a Pressure Cooker.  Larry was about to turn it off, when Elizabeth said, "Wait, they say it's explosion proof."  Larry replied, "Yeah, that's what they say, but I don't believe it.  Death by beans will not be in my future."  Elizabeth went on and on about all the wonderful meals we could make in a nanosecond  and it would be really good for us as we both worked and really didn't have time to cook during the week and it was on sale and we could return it if we didn't like it and we got a free cookbook with it and wasn't it really cute and it kept all of the nutrients in and .... well, you get the idea.  Three days later the doomsday machine arrived.

It was a Fagor Pressure Cooker and worked on the stove.  It had a safety lock on it so it was impossible for it to explode.  The first recipe we did was spaghetti sauce.  Larry refused to be in the kitchen until it was done and then ran in, removed the cooker from the stove and ran out of the kitchen until the pressure returned to normal.  It worked like a dream for over fifteen years.

Now, years later the Fagor Cooker is now replaced by a larger electric Cuisinart; pressure cooking is no longer a 'run for the bomb shelter' event in our family.  We have made many a wonderful meal in these safe to use appliances.  Food cooks amazingly fast.  Cheap cuts of meat become tender and the variations of what can be made in these machines is astounding and food comes out tender, flavors married like old folks celebrating their 60th anniversary.  We can not recommend them enough.  Do your self a favor and buy one.  Use it safely and in good health.  They are no longer an excuse to repaint the kitchen when the beans explode.

Following is the first thing we made.  Spaghetti meat sauce that tastes like it's been cooking all day at a slow simmer and yet it is ready in 8 minutes! Perfect for quick meals.  (We suppose one could make this in a slow cooker; we have just never tried it.)  Here's the recipe that started it for us and is still one of our very favorite Spaghetti meat sauces recipes.  Vivo Italiano (or something like that)!

RECIPE

1 Pound ground beef (We prefer the 97% fat free, but that's for health reasons ... the 80% is just as good.)
1 large onion chopped
1 clove garlic, minced
1/2 cup celery, chopped
1 green pepper, diced
2 teaspoons salt
1 cup water (We use 1/2 cup water, 1/2 cup red wine)
1 8 oz. can tomato sauce
1/8 tsp crushed red pepper flakes
1 tsp parsley flakes (2 tsp fresh parsley, finely chopped)
1/2 tsp Greek Oregano
1/2 tsp sweet basil
1 bay leaf
1/4 tsp thyme
2 tsp sugar
6 drops Tabasco sauce
1 6 oz. can tomato paste.

Heat cooker and brown meat in a tiny bit of olive oil.  Stir in remaining ingredients, except tomato paste.  Close cover and cook for eight minutes once cooker has come to high pressure.  Turn off and let pressure return to normal.  Stir in tomato paste and simmer uncovered to desired thickness.  Serve over pasta (we like the extra thin spaghetti).
  
Sprinkle with Parmesan cheese.  A word to the wise here.  Buy a block of Parmesan and grate it just before using.  (You will never use that canned stuff again!)  When the rind is left, put it in a bag in the freezer and throw it in with meats or stew.  Remove before serving.  Gives a richness and depth to the flavor.

Serve with tomato, avocado and basil salad and some garlic bread sprinkled with fresh parsley.


Sunday, September 11, 2011

GREEK WALNUT CAKE

GREEK WALNUT CAKE (KARITHOPITA)

Elizabeth has been making this cake for 38 years and it is one of our favorites.  It's simple to make and we guarantee that it will never go stale ... it won't stay around long enough!  It's best to make this one day ahead, pour the syrup over it and then let it sit overnight.  It's worth the wait!

RECIPE

Preheat oven to 350° and heavily butter an 8"x8"x2" square baking pan.

1 cup sifted all purpose flour
1 1/2 tsp baking powder (aluminum free)
1 heaping tsp ground cinnamon
1/4 tsp salt
1/4 heaping tsp freshly ground nutmeg
1/8 heaping tsp ground cloves
1/12 sticks sweet (unsalted) butter
3/4 cup sugar
3 eggs
grated zest of two medium oranges
1/4 cup milk
1 1/2 cups broken walnuts

HONEY SYRUP
1 small lemon
1/2 cup sugar
1/2 cup water
1 2" piece stick cinnamon
2 whole cloves
1/2 cup honey

Whole walnut halves for garnish (optional)

Sift flour then add baking powder, cinnamon, salt, nutmeg and cloves.  Sift two more times onto waxed paper and set aside.

Beat softened butter with sugar in large bowl with electric mixer at high speed until light and fluffy.  Add eggs, one at a time, beating well after each addition.  Add orange rind and mix.  Stir in flour mixture alternately with milk, beating after each addition.  Stir in flour mixture alternately with milk, beating after each addition, until batter is smooth.  Stir in nuts.  Pour into buttered baking pan.

Bake in moderate oven (350°) 35 minutes, or until center springs back when lightly pressed with finger.  Cook cake in pan on wire rack 30 minutes.  While cake is cooling, prepare Honey Syrup.

HONEY SYRUP

Remove rind (thin yellow, no white) from lemon.  This is best done with a vegetable peeler or zester.  Squeeze out lemon juice into a small cup (about 2 teaspoons) and set aside.  Place lemon rind, sugar, water, cinnamon stick and cloves in a heavy medium sized saucepan.  Bring to boiling, lower heat, continue to cook, without stirring 20 to 30 minutes, or until mixture is slightly syrupy.  Remove from heat and stir in honey.  Pour through a strainer and into a bowl.  Sir in reserved lemon juice.  Let sit until slightly cool.

Gradually pour or spoon cooled syrup over cake letting it soak into the cake before adding more.  Spoon into the corners and around the edges, carefully covering the entire surface.  Repeat until all the syrup is absorbed.  (If possible, let stand for 24 hours.) 

 Cut cake into 16 squares or diamonds.  Garnish each piece with a walnut half to serve, if desired.

The cake may be topped with a dab of whipped cream if desired, but is rich enough without it.  When removing the cake from the pan, be very careful, as it crumbles easily.

The cake travels very well in the pan and keeps well for several days covered with plastic wrap.

Sunday, August 28, 2011

GREEK WEEK

IT'S ALL GREEK TO ME

The fall semester is starting at the University of Kansas here in Lawrence and a recent article in the local newspaper about fraternity and sororities got us talking about Greek food which caused both of us to get hungry for lamb.  Larry discovered a pound of ground lamb in the freezer and Elizabeth remembered a recipe for a Greek Yogurt and Cucumber sauce (called Tzatziki) that she had on the computer and those started off a menu inspired by Greek seasonings.  PLUS, as a special inducement Elizabeth promised she would make Karithopita (Greek Walnut Cake) which she has been making for over 35 years.  That being one of Larry's favorite treats, it was off to the Agora (old Greek marketplace) to buy a few added items.

Tsatziki 
(Greek Yogurt and Cucumber Sauce)

2 Medium Cucumbers
2 cups Greek Yogurt
Juice of one large lemon
1 large garlic clove,chopped
1 Tbs kosher salt
1 Tbs finely chopped fresh dill or mint (dill is better!)
Freshly ground white pepper

Peel cucumbers and cut in half lengthwise.  Scrape out the seeds with a spoon.  Dice the cucumbers and place in a colander and sprinkle with 1 Tablespoon of Kosher salt.  Lightly stir.  Allow to sit and drain for 30 minutes.  Rinse, drain well and dry with paper towels.

Place cucumbers, garlic, lemon juice, dill and a few grinds of white pepper in a food processor or blender.  Process until well blended.  Stir in the yogurt and add additional pepper if needed.  VERY IMPORTANT:  Place in refrigerator for a minimum of two hours before serving.  Longer is even better.

The Tzatzaki wil lkeep for days in the refrigerator, but drain off any liquid that rises to the surface and stir before using.

LAMB PATTIES
1 lb ground lamb
1 green onion with top
1/2 teaspoon Mediterranean Oregano
2 Tbs. chopped fresh parsley
1 clove garlic or 1/4 tsp garlic powder
1 tsp fresh mint, chopped or 1/2 tsp. dried mint
Dash ground white pepper
1/4 tsp. sea salt

Mix all ingredients together and allow to sit for at least two hours.  Bring to room temperature.  Grill over medium coals until internal temperature reaches 160° for medium.

GREEK POTATOES 

Olive Oil
1 tsp Mediterranean Oregano
2 cloves of garlic, minced or 1/2 teaspoon garlic powder
1 pound thinly sliced potatoes (We use Simply Potatoes)

Place olive oil in heated 12" non-stick pan.  Add Mediterranean Oregano and garlic and cook for one minute, stirring occasionally.  Layer the potatoes in the pan, sprinkle with salt, freshly ground white pepper and squeeze the juice of one lemon over the potatoes.  Cover and cook over medium heat until nicely browned (about ten minutes).  Turn potatoes, cover and cook until browned.  They should be nice and crispy on both sides.

The first night we each had one patty, about a quarter of the potatoes, some of the sauce and slices of fresh tomato with feta cheese.

The second meal was comprised of the lamb patties in warmed pita bread stuffed with lettuce and sliced (or chopped) tomato and a generous amount of yogurt sauce and the remaining potatoes on the side with some sliced fresh peaches.


THE GREEK WALNUT CAKE WILL BE ON THE NEXT POST.


Saturday, August 20, 2011

ALMOST TANDOORI CHICKEN AND INDIAN BABY BACK RIBS

A LITTLE BACKGROUND

There once was a man by the name of Kundan Lal Gujral, a Hindu Punjabi.  He had a restaurant in Peshawar in the early twentieth century.  After India was partitioned in 1947, he fled to escape the rioting and eventually settled in Delhi.  There he developed new recipes, one of which was a chicken he cooked in tandoors, which, up to that time, were only used to cook bread (naan).  Tandoors are clay ovens that are heated with wood or charcoal and can reach extremely high temperatures (900°)!

This spicy chicken became a favorite of the first Prime Minister, Jawaharlal Nehru, and it was often served at state dinners where Richard Nixon, John F. Kennedy, Nikita Khruschev and the Shah of Iran were entertained.

Chicken Tikka Masala, a popular dish in Britan and now served in Indian restaurants around the world is a direct descendant of Tandoori Chicken.

Tandoori Chicken is noted for two things.  It should be cooked in a tandoori oven and has a lot of tumeric in it, which gives it the traditional red color.  The following meats are neither prepared in a tandoori or have any tumeric in them.  Thus the "almost" in the names.  (Note:  Tandoori ovens of all descriptions may be purchased on line if you would like to be authentic.)

We recently stumbled on a recipe for a tandoori type chicken and after playing around with it, we came up with the following recipe for Almost Tandoori Chicken.  However, while we were making this I wondered how a similar type of marinade would work with baby back ribs and from that came the Almost Tandoori Ribs.  The chicken is good; the ribs are outstanding!

ALMOST TANDOORI CHICKEN


1/4 tsp freshly ground black pepper
1 tsp ground cumin
1/2 tsp ground coriander
1 tsp chili powder
1 tsp Rogan Josh Indian seasoning (optional)
1/4 cup chopped cilantro
1/2 tsp salt (optional)
1/4 cup Frank's Original Hot Sauce (Tabasco would work as well, but you might cut down on it a bit depending on your tolerance for hot, hot, hot!)
1 cup plain non-fat yogurt
2 clove garlic, minced
3 Tbsp soy sauce
4 pieces bone-in chicken thighs with skin
Fresh lime slices

Combineall ingredients (except cooking spray and chicken) in a large bowl; stir until well blended.  Divide in equal portions.  

To one of the portions add 1/4 cup heavy cream.  Stir well.  Pour into plastic storage bag.  Add the chicken thighs.  Mix well and place in refrigerator for at least 8 hours or overnight.

ALMOST TANDOORI RIBS


To the remaining portion add:

1 inch fresh ginger root, peeled and finely chopped
1/4 tsp ground mustard
Juice of 1/2 lime

Remove membrane from back of ribs; cut into three portions and add the ribs to the marinade.  Store in plastic bag in the refrigerator at least 8 hours or overnight.

COOKING INSTRUCTIONS

Remove RIBS from refrigerator and let sit at room temperature for one hour.  At the end of the hour remove CHICKEN from refrigerator and set oven at 350°.  Place RIBS only on a rack and place in oven.  Brush with the marinade.  Cook for thirty minutes and then turn over and cook for another 30 minutes.  Prepare charcoal grill about 30 minutes in advance.  Coals should be banked for indirect heat.  

Place chicken and ribs on grill; cover.  Turn about every 15 minutes so they don't burn.  Chicken should be cooked for about 15 minutes on a side, then remove to a slightly cooler part of the grill while the ribs continue to cook.  Ribs will take about 30-45 minutes.  (Chicken should have an internal temperature of 165°.)  Serve with lentils and a cucumber salad or a tomato/avocado salad.  Use fresh limes to squeeze juice over chicken.


Thursday, August 18, 2011

RECONSTRUCTED BLT

A BLT FOR THE 21ST CENTURY

With garden fresh tomatoes in abundance in our part of the country, there is nothing better than a BLT on a hot summer day, topped off with a nice glass of iced tea ... or so we thought.

Last weekend we were fixing a BLT when we realized that we had no lettuce, were almost out of mayonnaise and the only bacon we had was peppered bacon.  Elizabeth, being sort of British by nature ... well, her father was born on the Isle of Man ... said we would just have to make due with what we had.  So, we have arrived at a Bacon, Basil, Spinach and Tomato sandwich with a bit of a kick.  Give this a try and serve it with some of the home made pickles.

BBST for Two
(Bacon, Basil, Spinach and Tomato)

5 slices of crispy cooked pepper bacon, cut in half  (Works well with Turkey bacon, too, but add a few slices)
4 spinach leaves
4 basil leaves
1 large ripe tomato, thinly sliced
4 slices of lightly toasted Pepperidge Farm White Sandwich Bread (Yeah, but it works best for these sandwiches)
Spicy Mayonnaise  (see below)

Spread mayo on the toasted bread.  Place tomato, 2 1/2 slices of bacon on top of the tomato and top with the basil and spinach leaves.  Put toothpicks in each half to hold it in place and cut in half VERY carefully.
Serve with kettle chips and lemonade.

Spicy Mayonnaise

Two tbsp mayonnaise (please do use REAL mayonnaise!)
1/2 tsp chipotle peppers in adobo sauce (we buy a small can of them and they keep well in a container in the refrigerator) or any spicy ground Mexican pepper will do.  Add a bit, taste, and add a bit more.  You could use a dash of cayenne and/or a shot of hot pepper sauce if that's all you have.
1/4 tsp fresh lime juice

Stir all ingredients together.


Saturday, August 13, 2011

SHOES, SHOES AND MORE SHOES ... ON THE TWENTY FIRST CENTURY


SHOES

     I have four pair of shoes: black, brown, tennis and a pair of sandals.
     I asked my men friends recently how many pair of shoes they had. Here is a sample of their responses.
    “Two pair of dress shoes; a pair of gym shoes and some flip flops.”
     “Three.”
     “Uh, why? That's a weird question dude.”
     “Probably four … maybe five.”
    Then I asked some of our lady friends the same question:
    “Dress shoes?, casual shoes?, sports shoes? … you will need to be more specific.”
    “Good grief, I have no idea … probably at least 50 or 60.”
    “I'd have to go home and count.”
    “In my closet, or would that include the fall and winter shoes in the attic and the spring shoes in storage in the garage.?”
    These questions came about because the other day Elizabeth brought home a sack with three new pairs of shoes in them … all black (or so I thought). I asked her why she needed three more pair of black shoes. I was told in no uncertain terms that they were not “BLACK”. One pair was midnight blue to go with a pair of slacks that she would someday have that were that color, but the shoes were on sale now and she didn't have any that color, so it was a good time to buy them. The other pair was ebony and they went with a purse that she bought three years ago and couldn't use because it didn't go with anything she owned, and the third pair was off-black (whatever that is) and went with a jacket she had.
    I asked her to show me her shoes. She has high heel shoes, which she admits she should get rid of because she will never wear spiked heels with pointed toes again … but, she needs to hold on to them until she finds the same color shoe in lower heels to go with the outfits that she bought the high heel shoes to go with in the first place in case she needs to wear one of the outfits for which she only has high heel shoes. I pretended to understand that.
    I asked her why she had sixteen pair of black shoes … they are grouped by color in the original shoe boxes in her closet. She very patiently explained that 1.) there were several shades of black to go with different shades of black clothes and accessories and 2.) that the shoes were of various heel heights and shapes because all of her pants were not the same length. And, since she couldn't wear white shoes after labor day (something I had never known) she might need a black pair to go with a black and white outfit. I pretended to understand that, too.
    Then I knew I had her. I found an identical pair of shoes. Exactly alike. She shook her head, “No they are not,” she explained, pointing at one pair.  “These are a size larger. If I'm going to be on my feet all day, I need to have them a bit bigger as my feet swell up and this pair wouldn't be comfortable … the other are for when I'm not going to be on my feet very long.” And, she went on, “This pair has leather soles which tend to be slippery so I can't wear them when it rains.” Again, I pretended to understand.
    “Okay,” I said, “But why don't you get rid of some of these? You've had them so long the sticker on the box has turned yellow.”
     She rolled her eyes, with that 'oh, why are men so ignorant' look. “Because you never know when a shoe may come back in style.”
    “That's ridiculous,” I said. “White plastic disco boots with stilleto heels will NEVER come back in style,” I pointed out knowing that I had finally won a round.
    “Fine,” Elizabeth said,  looking at my side of the closet,  “perhaps you can explain to me why you have approximately 80 ties hanging there. Wide ones, slim ones, flowered ones, ones with martini glasses on them, and even one with hula hoops on it?”
    “It's a guy thing,” I responded and left the closet with what little dignity I had remaining to me.


Thursday, August 11, 2011

THESE ARE NOT MY MOTHER'S PICKLES!

NITA'S BREAD AND BUTTER PICKLES

For years Elizabeth has made her mother's pickles.  About a year and a half ago we had to completely empty our office due to a remodel on the third floor of our house.  We packed up 70 shelves of books along with four filing cabinets, two of which were filled with Elizabeth recipe collection.  Being the King and Queen of Procrastination, the books and recipes are still awaiting their future in the garage ....

A couple of weeks ago Elizabeth announced that she wanted to make her mother's pickles but the recipe was not on MASTER COOK on her computer so it must be in the garage.   I gave her my 'be my guest' look.  She picked up the telephone and called her younger sister to see if she might have it.  Cindy said she did and gave it to Elizabeth who bought it home, reviewed it and announced, "These are NOT my mother's pickles."  Cindy assured us that, indeed, their mother had given her the recipe.  Well, Elizabeth made the pickles according to Cindy's mother's recipe and when we tasted them we agreed, "These are not your mother's pickles."  (We think they are more of a slightly sweet pickle, but very good.)

So today Larry suited up and covered with spray and lotion against an army of what he is sure are deadly recluse spiders, black widows, chiggers, sixty legged bugs the likes of what have never been seen before by modern man and went down to rescue Elizabeth's mother's pickle recipe.  After a long search of about thirty seconds (we may procrastinate, but we are organized) he found the box of recipes and we now have the REAL recipe.  Evidently Nita had two pickle recipes and gave Cindy and Elizabeth different recipes. Following are both of the recipes:

Nita's Bread and Butter Pickles

2 large English cucumbers, sliced
1/4 cup salt
Iced water to cover sliced cucumbers
1 large red pepper, cored and chopped
1 large yellow onion, thinly sliced
2 1/4 cups sugar
2 cups white vinegar
2 tsp whole celery seeds
2 tsp whole mustard seeds
large pinch of turmeric

Crisp cucumber slices in ice water and salt for one hour.  Drain and rinse well.  Mix red pepper and onion with drained cucumbers.

Mix sugar and vinegar in non-reactive saucepan and bring to a boil, stirring until sugar dissolves.  Mix in celery seed, mustard seed and turmeric.  Remove from heat and add cucumber mixture.  Stir gently.

Rinse glass 'canning' jars in boiling water.  You will need two to four depending on the size.  We use one quart jar.   Once jars are cool and cucumber mixture, seal and refrigerate.  Will last several months in refrigerator.

CRYSTAL PICKLE CHIPS
(or NOT MY MOTHER'S PICKLES)

1 large green pepper, seeded and thinly sliced
4 large firm cucumber, thinly sliced 
5 small white onions, peeled and thinly sliced
1 large garlic clove, peeled
1/4 cup salt
2 quarts cold water
14 ice cubes
3 1/2 cups sugar
1 1/2 cups white vinegar
1 tsp celery seed
1 tsp turmeric

Core and seed green pepper, slice thinly.  Put green pepper, cucumber, onion and garlic in large bowl.  Sprinkle with salt.  Add cold water and the ice cubes.  Let stand two hours.  Remove garlic; drain vegetables.  Mix sugar vinegar, mustard seed, celery seed and turmeric in large kettle.  Add vegetables, bring to a boil on high heat.  Remove from heat, pack into sterile jars.  Work out bubbles by pressing down firmly with a spoon.
Makes about 3 pints or 2 quart jars.


Sunday, August 7, 2011

CHEESE COCKTAIL CRACKERS

BETTER THAN CHEEZITS

Dorie Greenspan has a marvelous cookbook entitled AROUND MY FRENCH TABLE. It is filled with absolutely wonderful recipes, hints, suggestions and beautifully written anecdotes about her life in Paris.  We have not tried a recipe that has disappointed us.  Do your self and your taste buds a big favor and find this book.  We think it is one of the best cookbooks of its kind to come out since Julie Child (Bless the Lady!) appeared on the scene.  

This recipe is from a recipe in her book with a couple of changes.  These are full of cheese flavor with a tad of a kick from peppers.  Serve these with a nice glass of champagne; a lush red or a fruity white.  They go with almost anything, including a nice cold beer or ale.  They fall into the category of "Bet you can't eat just one!"


A VARIATION ON DORIE GREENSPAN'S
CHEEZ-IT-ISH CRACKERS

8 Tbsps unsalted butter (1 stick cold, cut into 18 to 20 pieces)
8 ounces EXTRA SHARP Cheddar, Gruyere, Comte or Emmenthal (1 1/2 cups packed, finely grated)
1/2 tsp sea salt
1/4 tsp freshly ground white pepper
1/8 tsp Aleppo pepper or cayenne (or a mixture of both)
1 cup plus 2 tbsps all-purpose flower.

Put the butter, cheese, salt, white pepper and Aleppo pepper (or cayenne, if using) in a food processor and pulse until the butter is broken up into uneven bits and the mixture forms small balls.  Add the flour and pulse until the dough forms moist little balls again or until dough comes together and everything is moist.

Turn out onto a work surface and knead gently until it blends into a fairly firm dough.  Divide in two and form each half into a log about 8" long and 1" thick.  Wrap in plastic wrap and chill for several hours or up to three days.  These may also be wrapped in foil and frozen.

Once the dough is chilled preheat oven to 350° and slice the dough into thin rounds and place the rounds on a parchment lined cookie sheet.  If frozen, allow to partially thaw then slice and bake.

Bake for 14 to 17 minutes or until lightly golden in color and firm to the touch.  Cool in a rack.

THESE ARE BEST SERVED WHEN COMPLETELY COOLED.  

DISHWASHER SALMON & SOUSED PORK ROAST

DISHWASHER SALMON ... WITH A BIT OF A KICK

Years ago we got an invitation to spend a few days on the yacht of a Count that a friend of ours was dating.  We weren't invited because of our charm, but rather because he had heard we knew how to cook turtle steak.  Larry managed to spend the first day turning green and hanging over the railing of the ship while Elizabeth held on to his belt so he wouldn't be pitched over board.  When we found calmer waters and Larry's color returned to something close to human, the Count said that he would cook dinner for us that evening and Larry could cook the turtle the next evening.  This is when we learned that it was possible to cook salmon in the dishwasher.  The Count said that it was the easy way to cook something when he had  guests.  This is very simple and we have since discovered numerous websites devoted to this method of cooking salmon.  Here's how we learned it:

Recipe

Salmon steaks or filets (one per person)
Heavy duty aluminum foil
Thinly sliced lemon
Fresh Dill
Salt and Freshly ground pepper to taste.

Lightly salt and pepper the salmon.  Place one or two slices of lemon on the salmon followed by a sprig of fresh dill.  Gently seal each piece of salmon in a piece of  HEAVY duty aluminum foil pinching the ends securely to make it water proof.  Wrap again with a second piece of HEAVY duty foil.  Place in the top rack of a dishwasher.  Turn the dishwasher on and run it through the full cycle.  VOILA!  Steamed salmon.

We have read that some people actually cook the fish and wash the dishes at the same time, but we've never been brave enough to try it.  If someone does this, please let us know how it turns out.

BOURBON DIPPING SAUCE

3/4 Cup Bourbon
2/3 Cup Light Brown Sugar
1 clove of garlic, minced or pressed
1 Tsp apple cider vinegar
1 Tbsp Worcestershire sauce
1 Tbsp honey
1/2 teaspoon ground mustard

Combine all ingredients.  Heat over medium high heat until it just starts to boil.  Reduce heat and simmer for about ten minutes.  Remove from heat and let cool.  Serve as a dipping sauce.

ANOTHER METHOD

If you are simply not brave enough to try the salmon in the dishwasher, here's an alternative.  Wash the salmon and pat dry.  Lightly salt and pepper the salmon and then place it on a non-stick cookie sheet or a cookie sheet sprayed with cooking spray.  Broil for about 6 minutes on each side, until the top develops a crispy crust or until salmon is slightly flaky.  Brush salmon with bourbon mixture or use it as a dipping sauce.

SOUSED PORK ROAST

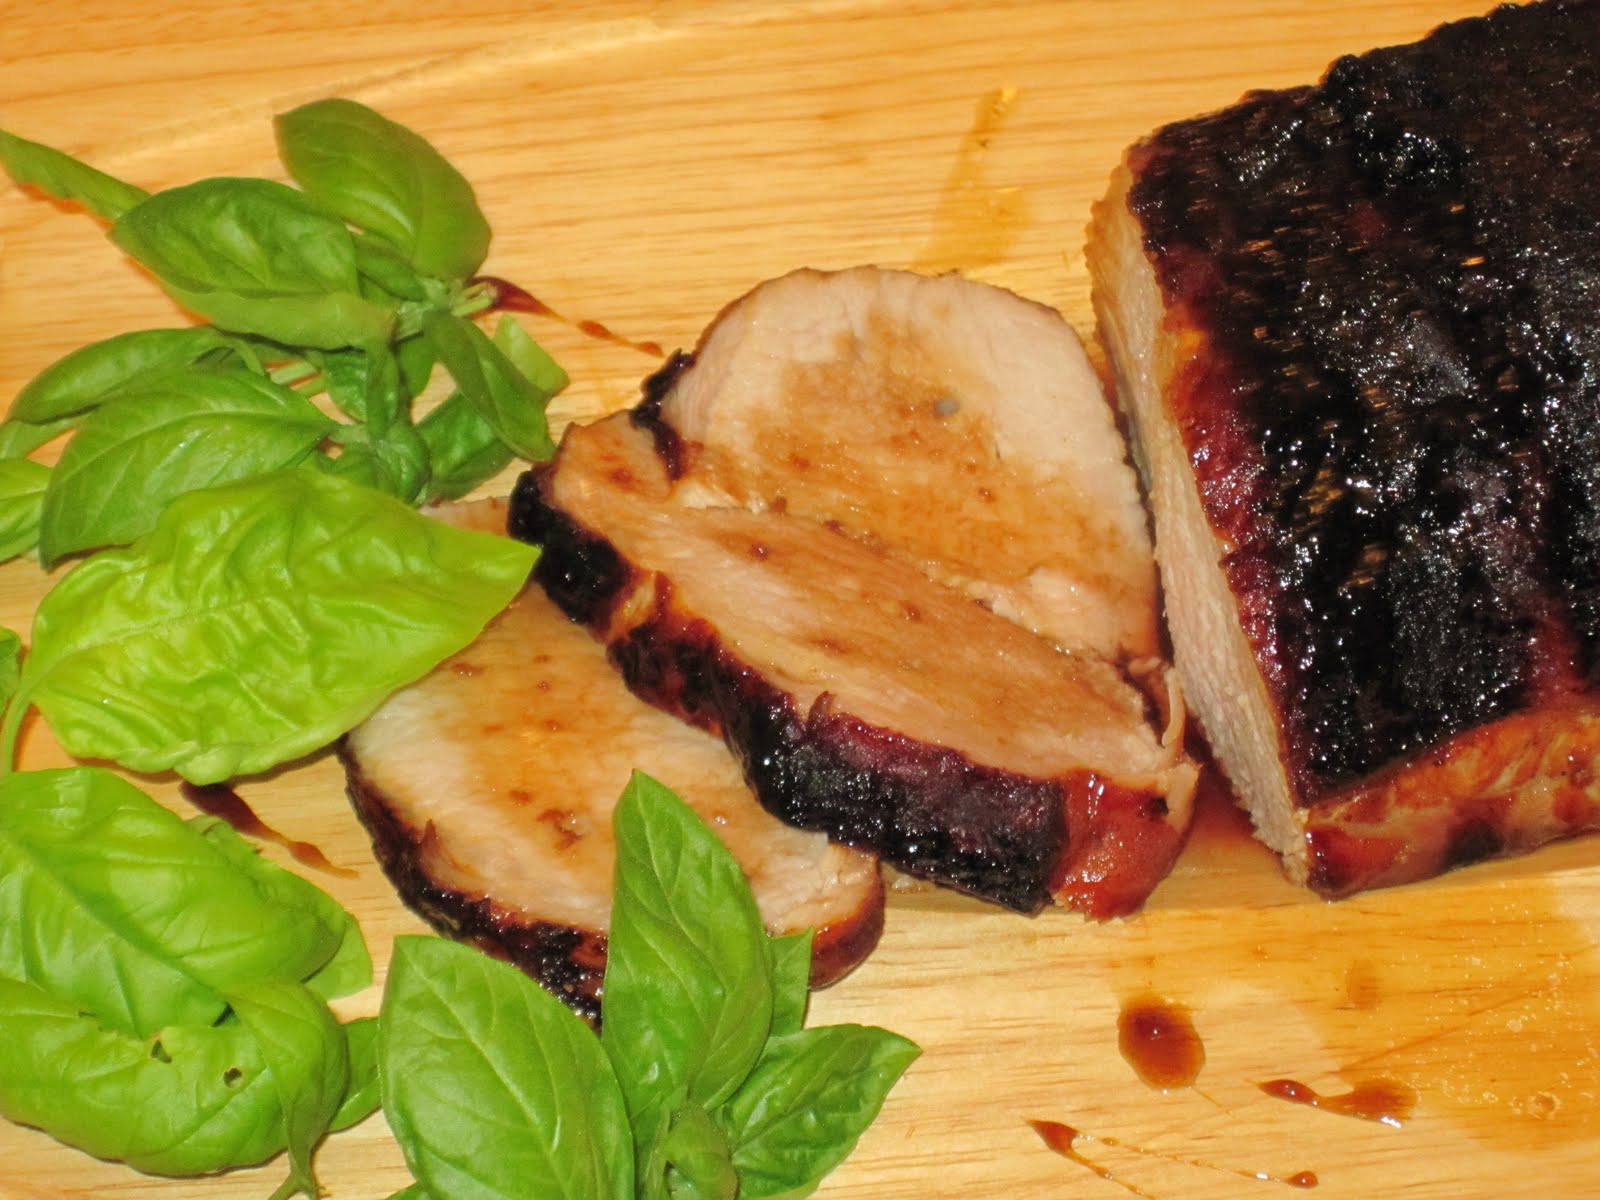
For a pork roast that's a little different, We recently put a 3 lb. boneless loin roast on our rotisserie.  We had some of the Bourbon Sauce left over from salmon and  basted the roast with it about every 20 minutes.  It made a  lovely crusty top on the roast and gave a nice Southern flavor to the pork.  Use any extra sauce to top off the sliced meat.  This would work equally well doing the roast in the oven and basting at 20 minute intervals.  Roast at 325° for about an hour or until meat temperature is 150°.  Cover loosely with a foil tent and allow to rest for 15 minutes or until temperature rises to 160°.  Great served with sweet potato and fresh broccoli     

Sunday, July 31, 2011

ONE FRITATTA, TWO FRITATTAS, THREE FRITATTAS MORE

ITALIAN FRITATTA


 Larry thinks that the first time he saw a fritatta was when he lived in Spain and Carmen, their cook, made one for lunch.  Since he was a child and the dish was  meatless, he wasn't interested.  Eggs and potatoes ... no thanks. 

 Flash forward several decades to when we lived in Los Angeles and one evening we went to a theatrical presentation called "Tamara".  This was a play that took place in an Italian Villa and it was unusual in that the audience of 100 followed a character of their choice through different rooms and situations.  Larry was following a chambermaid and Elizabeth was following the chauffeur when they, along with the rest of the cast and the audience, all came together in the 
kitchen.  At the start of the 'scene' a young man begin to saute sliced onions, potatoes, tomatoes, and herbs in olive oil.  He continued to saute and slice and stir, all the while carrying on dialogue with the other cast members while adding seasonings and eggs to the mixture.  Then, he suddenly picked up the pan and with a flick of the wrist tossed the entire mixture into the air where it flipped over revealing a golden brown top.  Instant ovation from the audience ... I mean, you can have your Hamlets, but this was true talent!  He continued to cook the other side, then slid it onto a plate and deftly sliced it into pieces which he shared with the cast while they continued the complex plot of the play.  (An Italian buffet was presented during intermission, but, alas, no fritatta.)

Unfortunately, Larry tried this at home ... once.  Have you ever tried to scrape burned egg and onion off of a burner, floor, walls, ceiling and kitchen counter?  Not fun!  

About two years ago we discovered a method of making fritattas that avoided any mess and now it is one of our favorite brunches or light suppers.

(Several friends of ours who follow this blog have requested that we go into a little more detail on some recipes as they are relatively new to cooking and would like a little more direction; that's what we've done here.)

Recipe
2 Tbsp Olive Oil, Divided
1 Medium onion, sliced and rings separated                      
5 Medium mushrooms, sliced
1 Medium ripe tomato, seeded
3/4 Tsp Italian Herb Mix (see previous post)
1 large russet potato
11/2 cups egg beater
1/4 cup freshly shredded Parmesan cheese
2 sprigs fresh parsley, minced
2 - 3 ounces prosciutto, coarsely chopped 
1/4 cup shredded sharp cheddar cheese
Heat a 10" non-stick, oven proof frying pan over medium heat.  Add enough oil to cover bottom, about 1 tablespoon.  Add the sliced onion, stir, and cook over medium low heat until soft and translucent.  Add the sliced mushrooms, cover and cook for about three minutes, being careful not to burn. 

Add the coarsely chopped seeded tomato and the Italian Herb mixture.  Stir gently, cover and continue to cook over medium low heat for about five minutes.
 
Remove all the vegetables from the pan with a slotted spoon.  Turn up the heat a bit and cook until most of the liquid has evaporated then add the chopped prosciutto and brown.  Remove it and place it on top of the vegetables and set aside.
Add enough oil to cover the bottom of the pan and add the thinly sliced potato.  Cook at medium/medium low, covered for about five minutes.  Uncover, add freshly ground pepper and a dash of salt (be careful here as the prosciutto is salty).  Gently turn the potato slices over, recover pan and cook for another five minutes.  The potato should be tender yet slightly crunchy.

While the potato is cooking, add the Parmesan cheese and parsley to the egg beater.  (Note:  I prefer the egg beaters to eggs.  There is no taste difference, they have less fat and they puff up and make the fritatta lighter then if made with eggs.  If you would prefer to use eggs, use six eggs, lightly beaten then add the cheese and parsley.)

When the potato is finished, add the vegetable and meat mixture back into the pan and gently stir.  We use a spatula and a small pair of tongs.  Cover and cook on medium low heat for about five minutes until the flavors have married.  

Preheat broiler and place a rack in the highest position.

Pour in the egg mixture being careful to distribute it evenly around the pan.  Cover and cook under medium low heat until the mixture has just started to set, about 3 minutes, but check at two.  Sprinkle the cheddar cheese on the top.

Place under broiler and cook for about 1 - 2 minutes until slightly brown on top.  Remove from oven to stove.  Let cool for about 2 minutes and then slice and serve.

This makes four generous servings.  Left overs save nicely wrapped in plastic wrap in the refrigerator and makes a great lunch after reheating in the microwave.

That's ONE FRITATTA.  FRITATTA NUMBER TWO would be omit the prosciutto.  Saute chopped green pepper with the onion.  Use chili powder in place of the Italian Herb Mix and a Spanish Fritatta is yours to enjoy.  And for THREE FRITATTAS MORE, use your imagination.  You can add crab or a little smoked trout to the Spanish Fritatta.  Another variation is to add bacon in lieu of the prosciutto and what ever seasoning you like.  Also good is pork sausage or turkey sausage crumbled and browned.   This is pretty hard to foul up once the basics are down.  Have fun with it!


WARRANTIES -- ON THE TWENTY FIRST CENTURY

WARRANTIES 

I’m firmly convinced that ESP exists.  I’m not altogether positive that human beings have this esoteric power, but I would be willing to swear that machines have it.  Otherwise, how would they know when the warranty was up so that they could have a nervous breakdown?
This week I awoke to the sounds of our refrigerator gasping as if it had just jogged ten miles up hill with a full freezer.  When the repairman arrived and told me what was wrong, I told him to go ahead and fix it.  He reminded me that I would have to pay cash as they didn’t extend credit. “No sweat,” I replied and handed him the warranty.  He had difficulty holding back the smirk as he handed me a bill for $375.00 along with the warranty that had expired the day before.
Two days later our washing machine tried to duplicate the deluge in our laundry room.  If there is a water shortage this summer, I’m afraid that I will have to take responsibility.  Since we got our refrigerator and the washer at the same store, we were unfortunate enough to get the same repairman as before.  As he sloshed through the garage and into the laundry room, I told him how glad I was that I had taken the extended warranty offered on the washing machine.  “Hmmmm,” was all he said.  Later I was stunned when he gave me a bill for $235.92.
“Extended warranty is only good for the motor,” he grinned, “You lost the pump.  Ain’t that funny?”
I’d have hit him, but I learned early in life that when you’re my size and a 6’5”, 300 pound person makes a joke – no matter how feeble – you at least smile.
After he left I went to my file cabinet and pulled out the WARRANTIES file.  Since it hasn’t been cleaned out for nine or ten years, it provided a glut of information about when we had purchased appliances and the length of time they were under warranty.  When I compared this to checks to repair shops, a pattern began to evolve.
The computer chipped out one week after the warranty; the printer printed its last three days after expiration and the plasma television managed to hang on for nearly a month after the guarantee lapsed before it blacked out.  The microwave nuked itself three weeks after the warranty  and the dishwasher wiped out six weeks after any chance of financial aid from its manufacturer.  I don’t think that American industry is clever enough to have planned obsolescence this well programmed.  I do think it’s the machines’ way of getting back at us for making them do all of our work.
One major exception to this is my car.  The warranty expired a year ago and the car continued to operate just fine.  My last payment was yesterday and today, on my way home from the grocery store, the transmission fell out.

Friday, July 29, 2011

MEXICAN CRAB ENCHILADA BRUNCH

CRAB & EGG ENCHILADA

This was a complete experiment.  We got up late one Sunday (well, we actually were up at 5:30 to walk the dog and give our diabetic cat his insulin shot, and then went back to bed), and were hungry for something a bit different for brunch.  Larry remembered we had some left over crab from two days ago from a recipe we tried and we had left over corn tortillas from making pork enchiladas for the freezer, so he started with that and from there it became a 'clean out the fridge' recipe.  

Now, Larry is not one for 'fishy' tasting things and Elizabeth is not overly fond of scrambled eggs, so we  tossed a couple of ideas out the window, and just started looking for leftover foods and going from there.  Here's what came about:
RECIPE
(Please improvise on amounts and ingredients.)

Chopped onion (I had 1/2 of a medium onion left over and chopped it.)
1/2 teaspoon cumin seed
1 semi-ripe tomato (or just about any tomato from the grocery store.  Don't use one of the really good ones from your local farmers' market, unless that's all you have) seeded then coarsely chopped
salt and freshly ground pepper to taste
4 eggs, lightly beaten
1/4 teaspoon chili powder
hot sauce to taste (5 - 6 drops)
3/4 cup crab meat 
4 corn tortillas
1 cup coarsely shredded extra sharp cheddar cheese
1 can mild enchilada sauce
1 can re-fried beans
1/4 cup chopped cilantro

Preheat oven to300 °.

Place about 1 tablespoon butter in a 10" non-stick pan.  Melt.  Add onions and cumin seed and saute about ten minutes until onion is soft.  Add chopped tomato.  Cook 5 minutes.  Salt and pepper to taste.

Add chili powder and hot sauce to eggs and lightly beat.  Place corn tortillas on a cooking sheet and spray each side of the tortillas.  Place in oven for three minutes, remove and turn oven up to 350°.

Pour eggs into vegetable mixture, add crab meat.  Cook until eggs are well set, turning gently several times.

Spoon egg mixture onto warm tortillas and fold each side in.  Lay folded side down in oven proof serving dishes.  Pour enchilada sauce over the tortillas and top with a bit of the cheese.  Place in oven for 10 to 15 minutes until bubbling.

Heat re-fried beans in microwave for 2 -3 minutes.

Remove enchiladas from oven, sprinkle with chopped cilantro.  Put a generous spoonful of beans on the plate, top with a bit of cheese and some cilantro.  We served it with some frozen grapes.

Serves 4 lightly or 2 servings for a hearty brunch or dinner.